Chapter 19: SimpleSite Tutorial Part 3
In this final part of the SimpleSite tutorial, you’ll add authentication and authorization facilities to SimpleSite so that only registered users can edit pages and so that only administrators can move pages or sections around or delete them.
After the authentication and authorization facilities are in place, you’ll learn how to customize Pylons’ error pages so that they use the same templates as the rest of SimpleSite. At that point, you’ll learn how to package up an application and publish it on the Python Package Index. Finally, you’ll turn the whole SimpleSite project into a project template (similar to the Pylons template you are used to using to with the paster create --template command) so that other people can use it as a basis for their own projects.
There’s a lot to do, so let’s get started!
Note
There is some code in Chapters 15 and 16 related to SimpleSite that handles animating the flash message, includes some extra CSS, and handles populating the before field drop-down list with Ajax. You should add this to your project before continuing with the tutorial or download the source code for the beginning of this chapter from the Apress website.
Authentication and Authorization
In the first part of this chapter, you’ll use AuthKit to add authentication and authorization facilities to the SimpleSite project. If you haven’t already installed AuthKit, you should do so now with this command:
$ easy_install "AuthKit>=0.4.3,<=0.4.99"
Setting Up the Middleware
You’ll remember from Chapter 18 that the first thing you need to do to use AuthKit in a Pylons application is to set up the AuthKit authentication middleware. Edit config/middleware.py, and add the following import at the top of the file:
import authkit.authenticate
Then add the AuthKit middleware immediately before the StatusCodeRedirect middleware (shown here in line 9):
- ::
- linenothreshold
5
app = RoutesMiddleware(app, config['routes.map'])
app = SessionMiddleware(app, config)
app = CacheMiddleware(app, config)

if asbool(full_stack):
    # Handle Python exceptions
    app = ErrorHandler(app, global_conf, **config['pylons.errorware'])

    app = authkit.authenticate.middleware(app, app_conf)

    # Display error documents for 401, 403, 404 status codes (and
    # 500 when debug is disabled)
    if asbool(config['debug']):
        app = StatusCodeRedirect(app)
    else:
        app = StatusCodeRedirect(app, [400, 401, 403, 404, 500])
- ::
- linenothreshold
5000
Note
If you find you have a conflict with the version of Pylons you are using or if you are using a configuration with the full_stack option set to false, set the AuthKit middleware up after the Cascade, just before the make_app() function returns app.
AuthKit comes with a SQLAlchemy driver that can be used to store AuthKit user information in a relational database. The driver requires slightly more configuration to integrate it into a Pylons project than the file-based UsersFromFile driver you saw in the previous chapter but is still fairly straightforward. First you’ll need to edit your development.ini file so that these lines appear at the end of the [app:main] section:
authkit.setup.enable = true
authkit.setup.method = form, cookie
authkit.form.authenticate.user.type = authkit.users.sqlalchemy_driver:UsersFromDatabase
authkit.form.authenticate.user.data = simplesite.model
authkit.cookie.secret = secret string
authkit.cookie.signoutpath = /signout
These options tell AuthKit that you are going to be using a SQLAlchemy database to manage the users and that the SQLAlchemy model used by the rest of your Pylons application is defined in the simplesite.model module.
AuthKit will expect the model to be set up in the standard way described in Chapter 7 with a Session object and the meta module present. It will add its own tables and classes to the model automatically during the first request, so you don’t need to manually change the model to use the new SQLAlchemy tables.
To make it harder for someone to guess a user’s cookie, you should always set a new string for the authkit.cookie.secret option. Using the same string as the example (which is secret string) isn’t very secure.
Adjusting websetup.py
At this point, the middleware is correctly configured, but the database tables AuthKit requires don’t exist yet. You’ll need to change SimpleSite’s websetup.py file so that these tables are created at the same time as any other tables used by your model.
First add the following import to the top of the websetup.py file:
from authkit.users.sqlalchemy_driver import UsersFromDatabase
Then after these lines:
# Load the models
from simplesite.model import meta
meta.metadata.bind = meta.engine
add these lines to add the AuthKit classes and mappers to the model:
log.info("Adding the AuthKit model...")
users = UsersFromDatabase(model)
Next you’ll need to add some users and roles to the application. After these lines:
# Create the tables if they aren't there already
meta.metadata.create_all(checkfirst=True)
add these:
log.info("Adding roles and uses...")

users.role_create("delete")
users.user_create("foo", password="bar")
users.user_create("admin", password="opensesame")
users.user_add_role("admin", role="delete")
While you are updating the websetup.py file, it also makes sense to add a default set of tags so that users can begin tagging pages. Although it doesn’t have anything to do with AuthKit, add these Pylons-related tags by adding these lines after the ones earlier:
log.info("Adding tags...")

tag1 = model.Tag()
tag1.name = u'Pylons'
meta.Session.add(tag1)

tag2 = model.Tag()
tag2.name = u'Paste'
meta.Session.add(tag2)

tag3 = model.Tag()
tag3.name = u'Tutorial'
meta.Session.add(tag3)

tag4 = model.Tag()
tag4.name = u'Database'
meta.Session.add(tag4)

tag5 = model.Tag()
tag5.name = u'Recipe'
meta.Session.add(tag5)
With the changes in place, you will need to drop the database you’ve been using so far or change the config file to use a new database so that you can set up the new AuthKit tables. Re-create the database with this command:
$ paster setup-app development.ini
Running setup_config() from simplesite.websetup
22:30:49,808 INFO  [simplesite.websetup] Adding the AuthKit model...
... omitted log output for brevity ...
22:30:50,076 INFO  [simplesite.websetup] Successfully set up.
If you are using the filter-with option in [app:main] you'll need to disable it to create the database. If all goes well and you see the Successfully set up message, you should find the new tables have been successfully created. If you use a command-line tool to inspect the database, you will notice that there are some new tables used by AuthKit, including users, roles, groups, and users_roles:
$ sqlite3 development.db
SQLite version 3.4.2
Enter ".help" for instructions
sqlite> .tables
comment      nav          pagetag      section      users
groups       page         roles        tag          users_roles
Protecting Controller Actions
Now that AuthKit is set up, let’s think about how it should be used in the SimpleSite application. Over the following sections, you’ll add functionality that allows anyone to create pages and sections but allows only signed-in users to edit or move them. Only users with the delete role should be able to delete pages or sections, edit comments, or rename tags.
Let’s start by ensuring only people who are signed in can edit pages. To do this, you need to add a ValidAuthKitUser() permission to the page controller’s edit action. Add the following imports at the top of the page.py controller:
from authkit.permissions import ValidAuthKitUser
from authkit.authorize.pylons_adaptors import authorize
Then add an authorize decorator before the edit() action so that it looks like this:
@authorize(ValidAuthKitUser())
def edit(self, id=None):
    ...
Let’s start the server and see what happens:
$ paster serve --reload development.ini
If you are following along from the previous chapter, close your browser to clear any AuthKit session cookies you might still have from the previous application, and visit http://localhost:5000/. You will be able to see the front page as usual (albeit with the extra tags), but if you click the Edit Page link at the bottom, you will be shown the AuthKit sign-in page you saw in Figure 18-1. Sign in with the username foo and the password bar, which were set up in the websetup.py file.
Once you are signed in, you can then see the edit page as usual, and because AuthKit auto-matically sets a cookie, on each subsequent request you will also be able to edit pages too because AuthKit can read the cookie to find out which user is signed in.
So far, you have protected the edit() action only, but it is the save() action that actually modifies the database, so currently a malicious user could still make changes to pages if they knew that there was a save() action. You’d better protect save() too:
@authorize(ValidAuthKitUser())
@restrict('POST')
@validate(schema=NewPageForm(), form='edit')
def save(self, id=None):
    ...
The decorators on both the edit() and save() actions use a different instance of the ValidAuthKitUser permission class, but AuthKit permission objects are designed to be used multiple times; therefore, a better way of organizing permissions is in their own module. Add a new file to the lib directory called auth.py, and add the following code to it:
from authkit.permissions import ValidAuthKitUser
is_valid_user = ValidAuthKitUser()
In the next section, you’ll need to access the is_valid_user permission in the templates as well as the controllers, so it makes sense to import the whole auth module into the lib/helpers.py so that permissions can be easily accessed via h.auth, for example, as h.auth.is_valid_user. Add this to the end of the helper imports:
from simplesite.lib import auth
Now you can update the @authorize decorators in the page controller to look like this:
@authorize(h.auth.is_valid_user)
You can also remove the import of the ValidAuthKitUser from the page controller if you like because it isn’t needed now, thanks to the addition of the permissions to the helpers module.
Although all signed-in users should be able to create new pages and edit existing ones, only users with the delete role should be able to delete pages. You’ll need to create a different permission object to handle this condition. Add the following line to lib/auth.py:
has_delete_role = HasAuthKitRole(['delete'])
You’ll also need to add this import at the top of the file:
from authkit.permissions import HasAuthKitRole
Now edit the page controller’s delete() action so that it looks like this:
@authorize(h.auth.has_delete_role)
def delete(self, id=None):
    ...
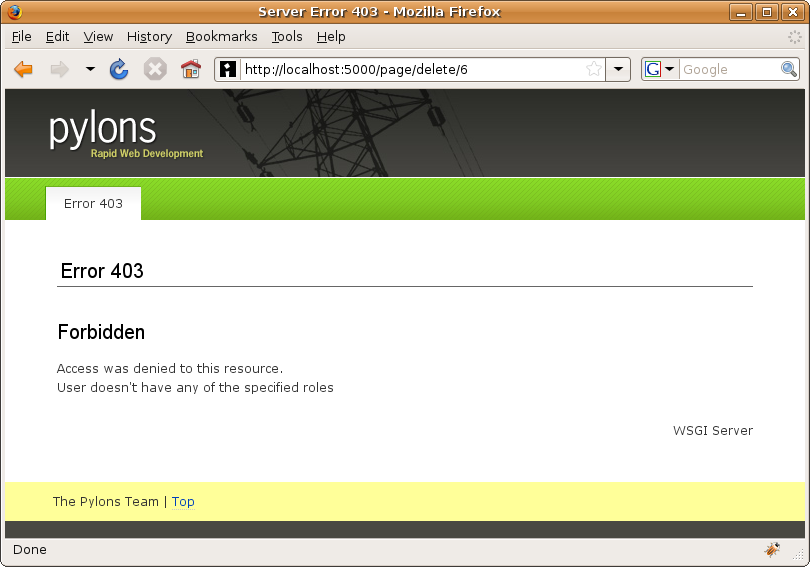
If you try to delete a page while still being signed in as the user foo, you will be shown the Pylons 403 Forbidden page because although you are signed in, you don’t have permission to access the resource, so AuthKit triggers a 403 response that the StatusCodeRedirect middleware will intercept to produce the error document (see Figure 19-1).
Now that you’ve tested the permissions as user foo, close the browser, and open it again at http://localhost:5000/. This will clear the AuthKit cookie and hence sign out the user foo. Now visit http://localhost:5000/page/edit/6 to edit the home page. Once again, you will be asked to sign in. This time sign in with the username admin and the password opensesame that you also set up in websetup.py. You’ll now find you have permission to delete pages because the admin user has the delete role.
Changing Templates Based on Permissions
Now that users who aren’t signed in can’t edit pages, it isn’t sensible to show them the Edit Page link. Once again, you can use AuthKit, but this time, you’ll use the authorized() function, which returns True if the user has the permission specified and False otherwise.
Let’s add this function to the lib/auth.py file so that it can easily be accessed as h.auth.authorized() from the project’s templates:
from authkit.authorize.pylons_adaptors import authorized
Now you can update the derived/page/view.html template so that the Edit Page link looks like this:
% if h.auth.authorized(h.auth.is_valid_user):
| <a href="${h.url_for(controller='page', action='edit', id=c.page.id)}">Edit
Page</a>
% endif
When a user is signed in, they will now see the Edit Page link, and when they are not, they won’t. This isn’t too easy to test yet, so let’s add some facilities for signing in and out more easily first.
Signing In and Signing Out
When you added the AuthKit configuration to the config file, you specified the option authkit.cookie.signoutpath = /signout. This means that when a user visits the path /signout, the AuthKit cookie will be removed, and they will be signed out. Try visiting http://localhost:5000/signout now. You’ll be shown the standard Create Page screen, but when you try to browse the site again, you’ll see that you’ve been signed out by the AuthKit middleware because the URL you visited matched the value of the authkit.cookie.signoutpath option in the config file.
Let’s add a new controller to the application to specifically handle signing in and signing out. Call this controller account because it could eventually be extended to handle other account functionality. Add it like this:
$ paster controller account
Edit the skeleton account controller in controllers/account.py so that it has the following two actions:
class AccountController(BaseController):

    def signin(self):
        if not request.environ.get('REMOTE_USER'):
            # This triggers the AuthKit middleware into displaying the sign-in form
            abort(401)
        else:
            return render('/derived/account/signedin.html')

    def signout(self):
        # The actual removal of the AuthKit cookie occurs when the response passes
        # through the AuthKit middleware, we simply need to display a page
        # confirming the user is signed out
        return render('/derived/account/signedout.html')
When a user is signed in, AuthKit sets the environment variable REMOTE_USER to contain the user’s username. The signin() action checks this to see whether it is present. If it isn’t, it aborts with a 401 response to trigger AuthKit to prompt the user to sign in.
Once a user is signed in, the signedin.html template is rendered. Create the templates/derived/account directory, and add the signedin.html template to it with the following content:
<%inherit file="/base/index.html"/>

<%def name="title()">Signed In</%def>
<%def name="heading()"><h1>Signed In</h1></%def>

<p>You are signed in as ${request.environ['REMOTE_USER']}.
<a href="${h.url_for(controller='account', action='signout')}">Sign out</a></p>
Next you’ll need to add the signedout.html template to the account directory too with the following content:
<%inherit file="/base/index.html"/>

<%def name="title()">Signed Out</%def>
<%def name="heading()"><h1>Signed Out</h1></%def>

<p>You have been signed out.</p>
Now you need to modify the routes so that the path /signin points to the signin() action and the path signout() points to the signout() action. Add the following named routes immediately after the # CUSTOM ROUTES HERE line in config/routing.py:
map.connect('signout', '/signout', controller='account', action='signout')
map.connect('signin', '/signin', controller='account', action='signin')
Now let’s add an extra line to the header so it contains a link to the signin() action when you are not signed in and contains your username and a link to the signout() action when you are signed in. Modify the base/index.html template so that the header has the extra links. Lines 6-14 are the ones you need to change:
- ::
- linenothreshold
5
<div id="hd">
    <div class="yui-gc">
        <div class="yui-u first">
            ${self.heading()}
        </div>
        <div class="yui-u">
            % if h.auth.authorized(h.auth.is_valid_user) and not (
               request.urlvars['controller'] == 'account' and request.urlvars['action'] == 'signout'):
                <p>Signed in as ${request.environ['REMOTE_USER']},
                    <a href="${h.url_for('signout')}">Sign out</a></p>
            % else:
                <p><a href="${h.url_for('signin')}">Sign in</a></p>
            % endif
        </div>
    </div>
    ${self.header()}
    ${self.tabs()}
</div>
- ::
- linenothreshold
5000
Because you don’t want the “Signed in as...” message on the signed-out page, you have to test the routing variables to ensure that the user isn’t on the signed-out page. The routing variables are always available as the request.urlvars dictionary, which can be useful if you haven’t explicitly added them to the template context global c.
Notice also that because you set up named routes for signing in and signing out in the config/routing.py file, you just need to specify the name of the route when using h.url_for(), and not the routing variables as well. This is particularly handy for routes that get used a lot or for ones that don’t have any variable parts.
You can also add a style so that the text appears on the right. Add this to public/css/main.css:
#hd p {
    text-align: right;
    padding-right: 20px;
    padding-top: 5px;
}
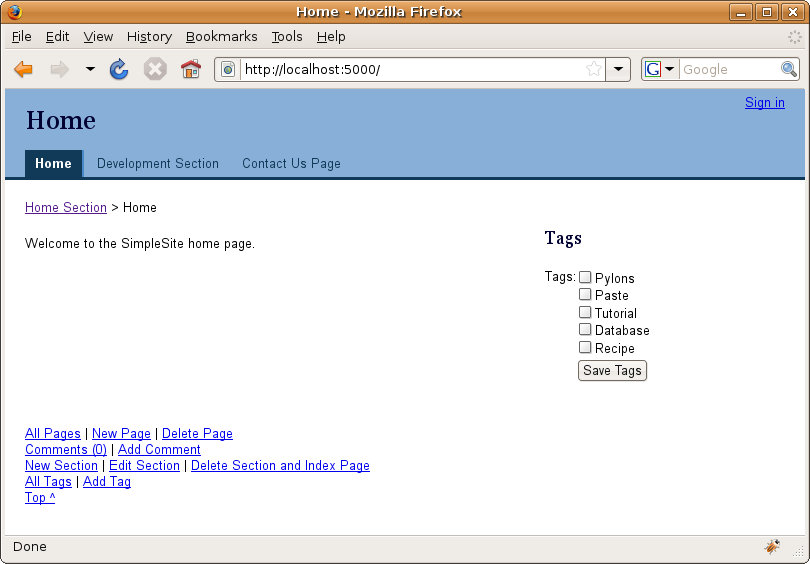
With these changes in place, you can test the sign-in and sign-out functionality. Figure 19-2 shows what the home page looks like when you are signed out. Notice the Sign In link in the top right and the fact the Edit Page link isn’t visible, because you are not signed in.
Styling the Sign-in Screen
You’ve now seen AuthKit and its user management API in action, but for a production system, you need to style the sign-in screen so that it looks like the rest of the site. AuthKit allows you to do this in two ways. The first is to provide all the HTML for the sign-in screen as a config option. In reality, though, it would be more useful if you could use the template structure you’ve set up for the rest of the pages so that if the styles in the base template were to change at some point in the future, you wouldn’t have to generate a new static version for AuthKit. Luckily, AuthKit also allows you to specify a custom function, which, when called, will generate a template dynamically. Let’s create such a function.
First, create a new template in derived/account/signin.html with this content:
<%inherit file="/base/index.html"/>

<%def name="title()">Sign In</%def>
<%def name="heading()"><h1>Sign In</h1></%def>

${h.form_start('%s', method="post")}
    ${h.field(
        "Username",
        h.text(name='username'),
    )}
    ${h.field(
        "Password",
        h.password(name='password'),
    )}
    ${h.field(field=h.submit(value="Sign in", name='submit'))}
${h.form_end()}
AuthKit expects the username and password to be submitted as the username and password fields, respectively, and is designed to handle a POST method. AuthKit will use Python string interpolation to replace the %s string with the URL the form needs to submit to. For this to work you'll need to import password from the webhelpers.html.tags module into lib/helpers.py.
Now let’s create a new function in lib/auth.py to render it:
def render_signin():
    return render('/derived/account/signin.html')
You’ll need to add this import to the top of the file:
from pylons.templating import render_mako as render
You can then specify in the development.ini config file that, instead of using the default template, AuthKit should call the render_signin() function you created in simplesite.lib.auth to render the signin.html page. Add this to the config options:
authkit.form.template.obj = simplesite.lib.auth:render_signin
Caution!
One potential problem with this approach is that if the HTML returned from the template contains other % characters, then the string interpolation will fail in AuthKit. In these situations, you can put a string such as FORM_ACTION in the signin.html template and then modify the render_signin() function to escape the % characters like this:
def render_signin():
    result = render('/derived/account/signin.html')
    result = result.replace('%', '%%').replace('FORM_ACTION', '%s')
    return result
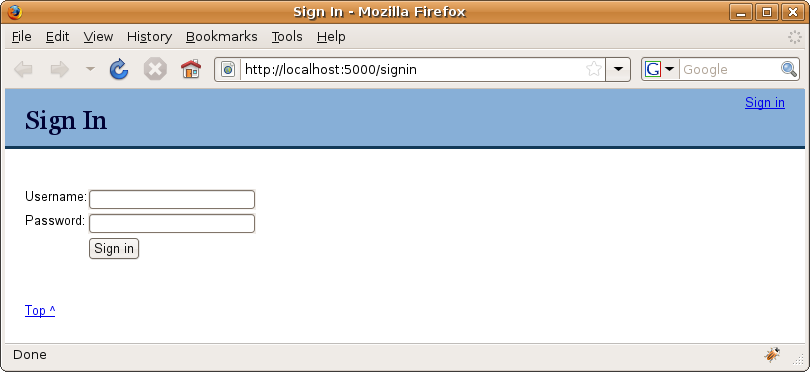
Once the server has restarted, you will be able to test the new sign-in screen (see Figure 19-3), and you should find it now shares the same theme as the rest of the site.
Now that you can sign in and out easily, have a go at signing in as the admin user. You’ll find you can delete pages as the admin user but not as the foo user.
Note
Previous versions of Pylons required a more complex version of the render_signin() function, so this works only with Pylons 0.9.7 or newer. This is because previous Pylons required the initialization of a component called Buffet before templates could be rendered, and this was not set up by the point in the middleware stack where AuthKit needed to access it to render the sign-in screen. Pylons 0.9.7 and newer replace Buffet with the simple render functions you learned about in Chapter 5 and that have been using throughout the book.
Protecting the Rest of the Actions
Now that the edit and delete functionality for the page controller is properly protected, you need to protect the actions in the other controllers. Table 19-1 lists the permission objects you need to add to each controller action with an @h.auth.authorize decorator. For this to work you'll need to import the`` @authorize`` decorator at the top of the lib/auth.py file. Once these permissions are added, you can continue with the tutorial.
Controller |
Permission |
Actions |
|---|---|---|
Page |
h.auth.is_valid_user |
edit(), save() |
Page |
h.auth.has_delete_role |
delete(), list() |
Section |
h.auth.is_valid_user |
edit(), save() |
Section |
h.auth.has_delete_role |
delete() |
Tab |
h.auth.has_delete_role |
delete(), list(), edit(), save() |
Comment |
h.auth.has_delete_role |
delete(), edit(), save() |
Table 19-1. The Controller Actions and Their Associated Permissions
With this setup and in line with the original requirements, anyone can now create pages and sections, but only signed-in users can edit or move them. Only users with the delete role can delete pages or sections, edit comments, or rename tags.
With this in mind, let’s update the page/view.html footer so that people are shown the links only for functionality they are entitled to use. The finished footer looks like this:
<%def name="footer()">
## Then add our page links
<p>
% if h.auth.authorized(h.auth.has_delete_role):
  <a href="${h.url_for(controller='page', action='list')}">All Pages</a> |
% endif
<a href="${h.url_for(controller='page', action='new', section=c.page.section,
before=c.page.before)}">New Page</a>
% if h.auth.authorized(h.auth.is_valid_user):
| <a href="${h.url_for(controller='page', action='edit', id=c.page.id)}">Edit
Page</a>
% endif
% if h.auth.authorized(h.auth.has_delete_role):
| <a href="${h.url_for(controller='page', action='delete', id=c.page.id)}">Delete
Page</a>
% endif
</p>
## Comment links
<p>
  <a href="${h.url_for(pageid=c.page.id, controller='comment', action='list')}"
>Comments (${str(c.comment_count)})</a>
| <a href="${h.url_for(pageid=c.page.id, controller='comment', action='new')}"
>Add Comment</a>
</p>
## Section links
<p>
  <a href="${h.url_for(controller='section', action='new', section=c.page.section,
before=c.page.before)}">New Section</a>
% if h.auth.authorized(h.auth.is_valid_user):
| <a href="${h.url_for(controller='section', action='edit', id=c.page.section)}"
>Edit Section</a>
% endif
% if h.auth.authorized(h.auth.has_delete_role):
| <a href="${h.url_for(controller='section', action='delete', id=c.page.section)}"
>Delete Section and Index Page</a>
% endif
</p>
## Tag links
<p>
% if h.auth.authorized(h.auth.has_delete_role):
<a href="${h.url_for(controller='tag', action='list')}">All Tags</a>
|
% endif
<a href="${h.url_for(controller='tag', action='new')}">Add Tag</a></p>
## Include the parent footer too
${parent.footer()}
</%def>
Finally, let’s update the base/index.html template’s footer so that there is always a link back to the home page available:
<%def name="footer()">
    <p>
        <a href="${h.url_for('/')}">[Home]</a> |
        <a href="#top">Top ^</a>
    </p>
</%def>
Notice the use of the explicit URL in the href attribute because you always want the link to point to the root of the site, no matter which page or section that serves. This still takes advantage of Routes’ ability to adjust URLs for you if the application is mounted at a nonroot URL.
Using the AuthKit User Management API
At this point, all the permissions are set up, but in real life you might want to add a new user to the system or perhaps change a user’s roles. You could do that by altering websetup.py and re-creating the database, but that would result in all your data being lost. Another solution would be to manually alter the data in the AuthKit tables using SQL, or you could even create your own interface for managing users. For the moment, though, let’s use the Pylons interactive shell.
Start the interactive shell like this:
$ paster shell development.ini
AuthKit automatically adds a UsersFromDatabase instance (like the one you used in websetup.py as the users object) to the authkit.users key in the WSGI environ dictionary so you can easily access it from your application, your tests, or the interactive shell. The commands below show you how to give the user foo the delete role. Don't run them just yet though.
>>> from pylons import request
>>> users = request.environ['authkit.users']
>>> users.user_add_role("foo", role="delete")
>>> from simplesite.model import meta
>>> meta.Session.commit()
The AuthKit users object has a series of different methods for managing users, described in detail at http://authkit.org/docs/0.4/class-authkit.users.Users.html. Using this API and the Pylons interactive shell, you can manipulate the AuthKit settings directly without needing to re-create any database tables.
Error Documents
Now that the authentication and authorization facilities are in place, let’s pause for a moment to look at how and why Pylons generates error documents such as the 403 error document shown in Figure 19-1.
In certain circumstances, your Pylons application will return a status code that isn’t 200. This might be because the URL requested doesn’t exist, because the user is not authorized to view a particular URL, or occasionally because there is a bug in your code that caused an exception. Most browsers will understand the status code and display some sort of error message so that the user knows what went wrong, but rather than relying on the browser to inform the user of the problem, it is often preferable for your application to display an error document so that the page contains the same branding as the rest of your site.
As you saw in Chapter 17, whenever a response with a 401, 403, 404, or 500 response is returned down the middleware chain as far as the StatusCodeRedirect middleware, it is intercepted, and a request is forwarded to your project’s error controller. The exact HTTP response status codes to be intercepted can be customized by changing the arguments to the StatusCodeRedirect middleware. The error controller itself is a special controller set up by Pylons specifically for generating error documents.
Your project’s controllers/error.py will look something like this:
import cgi
import os.path

from paste.urlparser import StaticURLParser
from pylons import request
from pylons.controllers.util import forward
from pylons.middleware import error_document_template, media_path
from webhelpers.html.builder import literal

from simplesite.lib.base import BaseController

class ErrorController(BaseController):

    def document(self):
        """Render the error document"""
        resp = request.environ.get('pylons.original_response')
        content = literal(resp.body) or cgi.escape(request.GET.get('message'))
        page = error_document_template % \
            dict(prefix=request.environ.get('SCRIPT_NAME', ''),
                 code=cgi.escape(request.GET.get('code', str(resp.status_int))),
                 message=content)
        return page

    def img(self, id):
        """Serve Pylons' stock images"""
        return self._serve_file(os.path.join(media_path, 'img'), id)

    def style(self, id):
        """Serve Pylons' stock stylesheets"""
        return self._serve_file(os.path.join(media_path, 'style'), id)

    def _serve_file(self, root, path):
        """Call Paste's FileApp (a WSGI application) to serve the file
        at the specified path
        """
        static = StaticURLParser(root)
        request.environ['PATH_INFO'] = '/%s' % path
        return static(request.environ, self.start_response)
When the StatusCodeRedirect middleware forwards a request, it does so by passing the status code and status message to the document() action of the error controller by modifying the request so that it looks as if it came from a URL such as this: /error/document?code=404&message=Not%20Found. It is the responsibility of the document() action to then return the HTML of the error document with the code and message provided.
For the default implementation, the error document is generated from the Python string error_document_template in the pylons.middleware module, which is used to generate a response after the code, and messages have been substituted in the appropriate places. What is craftier is that to avoid having to add error document static files into your project template, the Pylons developers have added two further actions, img() and style(), that both create a static file server application and serve the static files from the Pylons module directory. (They use the same StaticURLParser WSGI application that is used to serve files from your project directory.) The template then references these actions so that all the images and CSS styles that the default template use are actually served from the Pylons module directory and don’t clutter up your application.
Customizing the Error Documents for SimpleSite
Now that you’ve seen how error documents are generated by default, let’s look at how you can customize them to change the theme for the SimpleSite application. The easiest way to do this is to simply replace error_document_template with a different string containing the HTML you want returned. The string can contain the variables %(prefix)s, %(code)s, and %(message)s, which get substituted for the URL path where the application is mounted, the HTTP status code that was intercepted, and the default Pylons description of the HTTP status, respectively.
Although this approach works perfectly well, for the SimpleSite application you’ll go one step further and use a custom template to generate the error documents. To do this, you need to modify the document() action. Update it to look like this (lines 7 and 11-13 have changed):
- ::
- linenothreshold
5
def document(self):
    """Render the error document"""
    resp = request.environ.get('pylons.original_response')
    code = cgi.escape(request.GET.get('code', ''))
    content = cgi.escape(request.GET.get('message', ''))
    if resp:
        content = literal(resp.status)
        code = code or cgi.escape(str(resp.status_int))
    if not code:
        raise Exception('No status code was found')
    c.code = code
    c.message = content
    return render('/derived/error/document.html')
- ::
- linenothreshold
5000
The start of the action remains the same, but the lines in bold pass the code and message to a template rather than generating a response based on a string. Notice that you’ve also changed resp.body to resp.status because resp.body contains some HTML markup you don’t need.
For the previous code to work, you need to add imports for the c global and Mako render() function at the top of the file:
from pylons import tmpl_context as c
from simplesite.lib.base import render
Create the new derived/error/document.html template with the following content:
<%inherit file="/base/index.html"/>

<%def name="title()">Server Error ${c.code}</%def>
<%def name="heading()"><h1>Error ${c.code}</h1></%def>

<p>${c.message}</p>
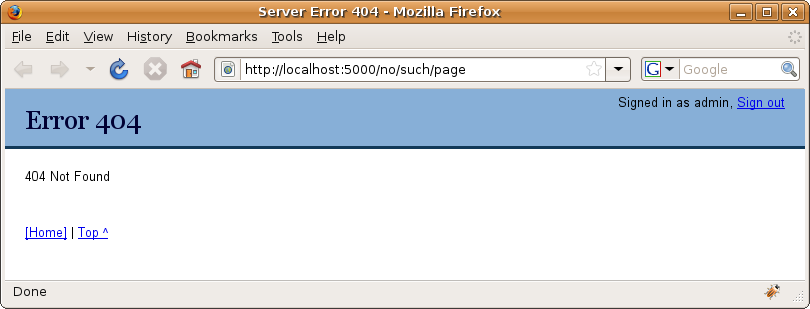
With the changes in place, you can test the template by visiting a page that doesn’t exist such as http://localhost:5000/no/such/page. The result is shown in Figure 19-4.
When a user tries to access functionality they don’t have access to, they are now shown the styled 403 error document. Although this is a significant improvement over the Pylons default version, it would be even better if the user was given a customized error message explaining that they don’t have the appropriate permissions to perform the action they are trying to perform. It would also be a good idea to provide a link so they can sign in as a different user who does have the required permissions.
Let’s start by customizing the template to display a custom message for the 403 status code and the link to allow the user to sign in again. Update the template so it looks like this:
<%inherit file="/base/index.html"/>

<%def name="title()">Server Error ${c.code}</%def>
<%def name="heading()"><h1>Error ${c.code}</h1></%def>

% if c.code == '403':
<p>You do not have sufficient permissions to access this page. Please
<a href="${h.url_for('signinagain')}">sign in</a> as a different user.</p>
% else:
<p>${c.message}</p>
% endif
When a user clicks the link, the action that gets called would need to sign them out before displaying the sign-in screen; otherwise, when they try to sign in, they will find they are still signed in as the original user.
Up until now, the only method you’ve seen for signing out a user is for them to visit the URL specified in the authkit.cookie.signoutpath option in the config file; this isn’t the only method you can use, though. The AuthKit cookie plug-in you are using is an extended version of the Paste paste.auth.auth_tkt functionality and as such uses the same API for signing out users. This means the AuthKit middleware adds a sign-out function to the environ dictionary under the key 'paste.auth_tkt.logout_user'. If you call this function, the middleware will remove the cookie from the headers after the response is returned. Now that you know this, you can write a new action that signs the user out and displays the sign-in form:
Add this action to the account controller:
def signinagain(self):
    request.environ['paste.auth_tkt.logout_user']()
    return render('/derived/account/signin.html').replace('%s', h.url_for('signin'))
Remember that the /derived/account/signin.html page isn’t a normal template. It has to be set up so that it returns a string that AuthKit can use Python string interpolation on to replace the %s character with the action. Since you are not using the template with AuthKit this time, you have to add the form action yourself. (If you are using FORM_ACTION instead of %s, you’ll have to adjust the last line accordingly.)
You’ll also need another route for the signinagain() action in the config/routing.py file:
map.connect('signinagain', '/signinagain', controller='account', action='signinagain')
Finally, add the import for h into the account controller:
import simplesite.lib.helpers as h
This new action is now accessible from /signinagain and presents the sign-in form with the action adjusted to point to the sign-in screen.
There’s one final change to make. You’ll need to update the base/index.html template so the “Signed in as...” link isn’t shown on the sign-in again page. Make the relevant line look like this:
            % if h.auth.authorized(h.auth.is_valid_user) and not (
request.urlvars['controller'] == 'account' and request.urlvars['action']
in ['signout', 'signinagain']):
If you sign in as user foo and try to access a URL such as http://localhost:5000/page/list, you will now be shown the page in Figure 19-5. Clicking the sign-in link will then take you to the sign-in again page, where you can sign in as a different user. With these changes in place, the customization of the error documents support is complete.

Adding a WYSIWYG Interface
Even with all the changes you’ve made so far, SimpleSite is still rather simple. After all, it can be used to edit only plain text, which isn’t too helpful for a website. In this section, you’ll update the edit page functionality to use the YUI Rich Text Editor, and you’ll change the page view template to allow HTML to be rendered.
Let’s start by thinking about the JavaScript required to change the content text area on the edit page to use a visual editor. The editor you’ll use is the YUI Rich Text Editor and is documented at http://developer.yahoo.com/yui/editor/. To set it up, you need to modify the derived/page/edit.html template so that the js() def looks like this:
<%def name="js()">
    ${parent.js()}
    ${navfields.js()}

    <script type="text/javascript"
        src="/yui/2.6.0/element/element-beta-min.js"></script>
    <script type="text/javascript"
        src="/yui/2.6.0/container/container_core-min.js"></script>
    <script type="text/javascript"
        src="/yui/2.6.0/editor/simpleeditor-min.js"></script>

    <script type="text/javascript">
    (function() {
        // Set up some private variables
        var Dom = YAHOO.util.Dom;
        var Event = YAHOO.util.Event;

        // The SimpleEditor config
        var myConfig = {
            height: '200px',
            width: '630px',
            dompath: true,
            focusAtStart: true,
            handleSubmit: true
        };

        // Now let's load the SimpleEditor..
        var myEditor = new YAHOO.widget.SimpleEditor('editor', myConfig);
        myEditor._defaultToolbar.buttonType = 'advanced';
        document.e = myEditor;
        myEditor._defaultToolbar.titlebar = 'Rich Text Editor';
        myEditor.render();
    })();
    </script>
</%def>
Ordinarily, you would also need the yahoo-dom-event and connection libraries, but you are already using these to support the callAJAX() function used to update the before field, so you don’t need to include them again.
For the previous JavaScript to work, you need some more changes. First, you need to add id="editor" to the text area used to edit the content so that the JavaScript you’ve added is applied to the correct element. Change derived/page/fields.html so the content field definition looks like this with a text area with a id=editor attribute:
${h.field(
    "Content",
    h.textarea(name='content', rows=7, cols=40, id='editor'),
    required=True,
    field_desc = 'The text which will make up the body of the page'
)}
If you were to try to edit the page now, you’d see that although you could correctly edit the text, the Rich Text Editor wouldn’t be displayed correctly. This is because you haven’t yet chosen a theme for YUI.
YUI’s theming system relies on the name of the theme to be used being specified as the class of the <body> tag. The default theme is called sam skin, so you’ll use this one. Update the <body> tag in base/index.html so that it looks like this:
<body class="yui-skin-sam">
Finally, add this def to the end of derived/page/edit.html.
<%def name="head()">
    ${parent.head()}
    ${h.stylesheet_link(h.url_for('/yui/2.6.0/assets/skins/sam/skin.css'))}
</%def>
With these changes in place, try editing a page, and you should see an editor that allows you to add content such as that shown in Figure 19-6.

If you try to use the editor to create a complex page, you’ll notice that, because you were conscientious when designing the application, your HTML content is automatically escaped when viewing pages. To prevent the HTML page’s content from being escaped, you can edit derived/page/view.html and replace this line:
${(c.page.content)}
with these lines so that content is treated as an HTML literal:
<%!
    from webhelpers.html import literal
%>
<div id="page-content">
${literal(c.page.content)}
</div>
The final problem is that since you are using the YUI reset.css styles in the SimpleSite pages, some of the styles that looked correct in the editor get reset when you view the HTML. To fix this, add the following styles to the end of the public/css/main.css file:
#page-content strong {
    font-weight: bold;
}
#page-content em {
    font-style: italic;
}
#page-content p {
    margin-bottom: 20px;
}
#page-content ol, #page-content ul {
    margin: 20px 20px 20px 1em;
    padding-left: 20px;
}
#page-content ol li {
    list-style: decimal;
}
#page-content ul li {
    list-style: disc;
}
The pages will now display correctly.
Configuring the setup.py File
At this point, the SimpleSite application is pretty much finished, so it is nearly time to package it up to be distributed. Pylons comes equipped with quite a few tools to help you easily publish your application and to allow other people to easily install it and its dependencies. We’ll look at these tools in this section.
Before you can publish the egg, there are a number of changes you need to make including the following:
Choosing a version number
Configuring dependencies
Specifying metadata
Customizing the production config file template
Choosing a Version Number
The first step in distributing an application is to choose a version number for the project. Ordinarily, the 1.0.0 release is considered to be the first main release of a project. You’ve made three core sets of revisions to SimpleSite in each of the three chapters, but there are still some changes you might like to make before this is an official product you’d be proud to distribute more widely (notably the lack of documentation), so it probably isn’t ready for a 1.0.0 release just yet. Let’s set the version number to 0.3.0 to reflect the fact that this is the third minor revision.
The version number is set in setup.py and is used by Easy Install when determining which version to install. Update the version number for the SimpleSite project like this:
version = '0.3.0',
This example uses a simple version number, but Pylons also supports development releases and alpha, beta, and prerelease versions.
Let’s start with alpha, beta, and prerelease releases. These are treated by setuptools as being before the final version for the purposes of their use in Easy Install conditions. For example, 0.5.0a1 would be considered the first alpha release of the 0.5 version of a particular application. Similarly, 0.5.0pre2 would be the second prerelease, and 0.5.0rc3 would be the third release candidate. This means that if certain software required version 0.5 or greater, none of the releases specified so far would be suitable.
For example, during the process of writing the book, I released the first version of the SimpleSite code as version 0.3.0pre1. As the book went into production, I released the 0.3.0 release, but if there are changes to Pylons before the book is released and these need corresponding changes in SimpleSite, I’d release a 0.3.1 release.
Development versions are slightly more complicated but are an equally useful feature. In development mode, setuptools automatically calculates the version revision number from the revision of the Subversion repository you are currently developing the Pylons application in (if indeed you are using Subversion). By default, Pylons applications are set up to be treated as a development version, which means the .egg file produced from it will have dev as part of the version. For example, if the repository is at revision 68, then the egg produced would be labeled SimpleSite-0.3.0dev-r68_py2.5.egg. If you want your release to be treated as a production release, you need to edit setup.cfg and comment out these two lines:
[egg_info]
#tag_build = dev
#tag_svn_revision = true
You should make this change to the SimpleSite project.
At this point, the project is set up to build the egg for the 0.3.0 production release so the egg produced will be named SimpleSite-0.3.0_py2.5.egg, but there are still some changes you need to make.
Configuring Dependencies
Now that the version number has been specified, let’s update the list of libraries and other Python software the application depends on. This is done by adding the dependencies to the install_requires argument of the setup() function in your project’s setup.py file. When you install software with Easy Install, the easy_install script automatically installs all the software specified in the install_requires line. The SimpleSite setup.py file currently has an install_requires, which looks like this:
install_requires=[
    "Pylons>=0.9.7",
    "SQLAlchemy>=0.4",
    "Mako",
    "FormBuild>=2.0",
],
Update this information to use SQLAlchemy 0.5 and to include AuthKit 0.4.3.
Here’s what the lines should look like:
install_requires=[
    "Pylons>=0.9.7,<=0.9.7.99",
    "SQLAlchemy>=0.5,<=0.5.99",
    "Mako>=0.2.2,<=0.2.99",
    "FormBuild>=2.0.1,<=2.0.99",
    "AuthKit>=0.4.3,<=0.4.99",
],
Notice that you’ve specified all the dependencies with version numbers in a particular range. Package developers should be using the convention that any software release where only the revision has changed (the revision being the very last number making up the version) will be compatible with all previous versions with the same major and minor numbers (the first and second parts of the version, respectively). This means you can be fairly confident that your application should work with more recent versions of the dependencies as long as the major and minor components of the version number haven’t changed. By specifying a range of suitable alternatives in your application, if any bug fix releases of the dependencies are made, SimpleSite can use them. It also means that if a user has a slightly different yet still compatible version of a dependency already installed, then Easy Install can use that rather than downloading a new version.
Note
You might expect that you would be able to specify dependencies like this:
"AuthKit>=0.4,<=0.5"
This isn’t quite what you want, though, because as has already been discussed, Easy Install would also treat other AuthKit versions including 0.5.0dev, 0.5.0a1, and 0.5.0pre2 as being lower than 0.5, and since these have a different minor version, the APIs might not be backward compatible with the 0.4 release. Instead, the convention is to use <0.4.99 on the basis that it is unlikely that there would be 99 revisions of a minor version of a piece of software.
Extra Dependencies
Sometimes you might want a particular dependency installed only if a user is installing a particular feature. As an example, SimpleSite is designed to work with multiple database engines, each of which require a particular driver. Let’s focus on just MySQL and PostgreSQL, though. You wouldn’t want to list both the mysql-python and psycopg2 packages in the install_requires line as dependencies because your users would only ever need one of the drivers. On the other hand, if you left out the drivers completely, they would not be automatically installed when SimpleSite was installed.
To cater for this situation, Pylons applications can use the setuptools optional extra dependency feature. Add the following to the end of the setup() function in setup.py:
extras_require = {
    'MySQL':  ["mysql-python>=1.2"],
    'PostgreSQL': ["psycopg2"],
},
Each of the extras is specified as a key and a list of all the dependencies. In this case, both the extras require only one dependency to be installed.
When it comes to installing SimpleSite, the extras required can be specified like this:
$ easy_install SimpleSite[MySQL]
This will now automatically install the mysql-python package version 1.2 or greater, which provides the MySQLdb module that SQLAlchemy uses for its MySQL support.
Extra Dependency Links
By default, Easy Install installs software only from the Python Package Index unless you use the -f flag to specify extra URLs.
If your application relies on packages hosted at different URLs, you can add them to the setup() function like this:
dependency_links = [
    "http://pylonshq.com/download/"
],
Easy Install will automatically search these links when trying to resolve the dependencies.
Specifying Metadata
As well as allowing you to specify dependencies, the setup() function takes arguments for specifying metadata about your project. This metadata is used as the basis for the information on the Python Package Index. Update the setup.py with the following metadata:
setup(
    name='SimpleSite',
    version='0.3.0',
    description='''A simple website application written as a demonstration of Pylons
for the Definitive Guide to Pylons''',
    author='James Gardner',
author_email='feedback@pylonsbook.com',
    url='http://pylonsbook.com',
    long_description='''\
A simple CMS application allowing WYSIWYG page editing, sections and subsections
and full navigation widgets
    ''',
    ... other options here ...
)
The short_description argument is used in the list on the home page of the Python Package Index, and the long_description argument is used in the main page for the project on the Python Package Index. In addition to the author, author_email, and home page url, you can also specify which categories the application should be placed in. The categories are known as trove classifiers, and you can find a full list at http://pypi.python.org/pypi?%3Aaction=list_classifiers. Here are the classifiers for Pylons itself:
classifiers=[
    "Development Status :: 5 - Production/Stable",
    "Intended Audience :: Developers",
    "License :: OSI Approved :: BSD License",
    "Framework :: Pylons",
    "Programming Language :: Python",
    "Topic :: Internet :: WWW/HTTP",
    "Topic :: Internet :: WWW/HTTP :: Dynamic Content",
    "Topic :: Internet :: WWW/HTTP :: WSGI",
    "Topic :: Software Development :: Libraries :: Python Modules",
],
In addition, it can also be useful to specify keywords related to the application and the license:
keywords='pylons simple site book example',
license='BSD, see the simplesite/public/yui/2.6.0/LICENSE.txt file for details.
Customizing the Long Description
The long_description argument is used on the main page for the package and also accepts reStructuredText, which you learned about in Chapter 13. This means you can add some quite complex formatting to the long description. You can use something like this, for example:
++++++++++
SimpleSite
++++++++++

A simple website application allowing WYSIWYG editing, sections and
subsections and full navigation widgets. The idea is that the application can
form a starting point for your own website projects.


Installation
============

First install Easy Install if you don't have it already by downloading
``ez_setup.py`` from http://peak.telecommunity.com/dist/ez_setup.py and
installing it like this::

    python ez_setup.py

Install SimpleSite like this specifying either MySQL, SQLite or PostgreSQL
as the word within the square brackets depending on the database you intend to
use::

    easy_install SimpleSite["MySQL"]
    paster make-config simplesite.ini

Configure the application by editing ``simplesite.ini`` to specify a database
to use using the format described at
http://www.sqlalchemy.org/docs/05/dbengine.html#dbengine_supported ::

    paster setup-app simplesite.ini
    paster serve simplesite.ini

The running application will now be available at http://localhost/

Files
=====
The reason for the Files subheading at the end is that the Python Package Index specifies the files after the long description, so this formatting will result in a nicely structured page on the Python Package Index.
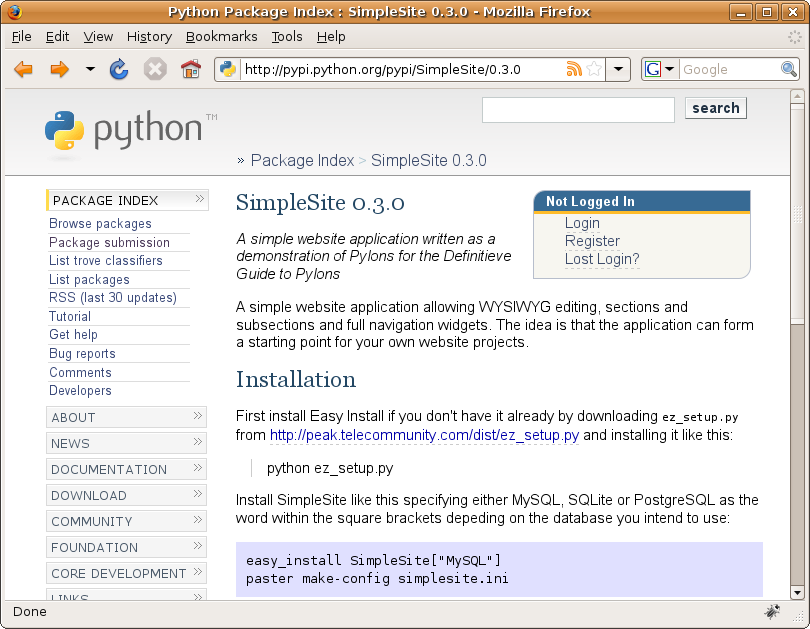
With these changes in place, the Python Package Index page for the project will look eventually look like Figure 19-7 once the package is published.
Customizing the Production Config File Template
There is one more customization you need to make before you are ready to publish the egg itself. As you’ll see in Chapter 21 about deployment, when a user has installed your .egg, they will run the application directly from a config file. To create the config file, they’ll use this command:
$ paster make-config SimpleSite myconfig.ini
The SimpleSite application requires the AuthKit configuration options to be present in the config file that the earlier command generates. To achieve this, you need to customize how Pylons generates the config file. Pylon provides a deployment.ini_tmpl file in your project’s config directory, which will be used as a basis for generating this config file, so you should update it to contain the AuthKit configuration (lines 25-31 here):
- ::
- linenothreshold
5
#
# SimpleSite - Pylons configuration
#
# The %(here)s variable will be replaced with the parent directory of this file
#
[DEFAULT]
debug = true
email_to = you@yourdomain.com
smtp_server = localhost
error_email_from = paste@localhost

[server:main]
use = egg:Paste#http
host = 0.0.0.0
port = 5000

[app:main]
use = egg:SimpleSite
full_stack = true
cache_dir = %(here)s/data
beaker.session.key = simplesite
beaker.session.secret = ${app_instance_secret}
app_instance_uuid = ${app_instance_uuid}

authkit.setup.enable = true
authkit.setup.method = form, cookie
authkit.form.authenticate.user.type = authkit.users.sqlalchemy_driver:UsersFromDatabase
authkit.form.authenticate.user.data = simplesite.model
authkit.cookie.secret = secret string
authkit.cookie.signoutpath = /signout
authkit.form.template.obj = simplesite.lib.auth:render_signin

# If you'd like to fine-tune the individual locations of the cache data dirs
# for the Cache data, or the Session saves, un-comment the desired settings
# here:
#beaker.cache.data_dir = %(here)s/data/cache
#beaker.session.data_dir = %(here)s/data/sessions
# SQLAlchemy database URL
sqlalchemy.url = sqlite:///production.db
sqlalchemy.echo = False

# WARNING: *THE LINE BELOW MUST BE UNCOMMENTED ON A PRODUCTION ENVIRONMENT*
# Debug mode will enable the interactive debugging tool, allowing ANYONE to
# execute malicious code after an exception is raised.
set debug = false

# Logging configuration
[loggers]
keys = root

[handlers]
keys = console

[formatters]
keys = generic

[logger_root]
level = INFO
handlers = console

[handler_console]
class = StreamHandler
args = (sys.stderr,)
level = NOTSET
formatter = generic

[formatter_generic]
format = %(asctime)s %(levelname)-5.5s [%(name)s] %(message)s
- ::
- linenothreshold
5000
You’ll notice that this file is slightly different from the default development.ini file. In particular, it has these two extra lines:
beaker.session.secret = ${app_instance_secret}
app_instance_uuid = ${app_instance_uuid}
The variables ${app_instance_secret} and ${app_instance_uuid} are replaced with appropriate values when the user of the application runs the paster make-config command.
You’ll also notice that debugging is automatically set to false to ensure that production deployments don’t accidentally have the Pylons interactive debugger enabled.
Tip
Pylons 0.9.6 users will be used to using a paste_deploy_config.ini_tmpl in their project’s ProjectName.egg-info directory. The config/deployment.ini_tmpl file behaves in the same way but is in a location that is less likely to be deleted accidentally.
Packaging a Pylons Project for Distribution
Now that you know how to customize setup.py, let’s look at how to package the SimpleSite application.
Pylons applications are designed to be distributed as .egg files. This is the same format that Pylons itself and all its dependencies are distributed in. You’ll remember from Chapter 2 that applications distributed as eggs can be installed with Easy Install. This means that if your Pylons application is published on the Python Package Index, other users will be able to install it with Easy Install too. Let’s start by looking at how to build an egg.
Building an Egg File
The first step of building an egg is to remove any unnecessary files that you don’t want packaged. In this case, this includes any of the YUI library files the application is not using. By looking at Firebug’s Net tab when using the application, you can see that only the following files are being used:
/css/main.css
/yui/2.6.0/animation/animation-min.js
/yui/2.6.0/assets/skins/sam/blankimage.png
/yui/2.6.0/assets/skins/sam/editor-sprite.gif
/yui/2.6.0/assets/skins/sam/editor-sprite-active.gif
/yui/2.6.0/assets/skins/sam/skin.css
/yui/2.6.0/assets/skins/sam/sprite.png
/yui/2.6.0/connection/connection-min.js
/yui/2.6.0/container/container_core-min.js
/yui/2.6.0/editor/simpleeditor-min.js
/yui/2.6.0/element/element-beta-min.js
/yui/2.6.0/json/json-min.js
/yui/2.6.0/reset-fonts-grids/reset-fonts-grids.css
/yui/2.6.0/yahoo-dom-event/yahoo-dom-event.js
You should remove all the other files from your project’s public directory. Also, because YUI is licensed under a separate license, you should also add the text of the license to /yui/2.6.0/LICENSE.txt. Then you are ready to build the egg. You can do so with this command:
$ python setup.py bdist_egg
If everything goes smoothly, an .egg file with the correct name and version number appears in a newly created dist directory. The .egg file contains everything anyone needs to run your program. You should probably make eggs for each version of Python your users might require by running the previous command with Python 2.4, 2.5, and 2.6 to create each version of the egg.
At this point, your work as a developer is done. The finished and packaged egg file is now produced and ready to be distributed or deployed. If you emailed the egg to a colleague, they could now install it into their own virtual Python environment just like this:
$ easy_install SimpleSite-0.3.0-py2.5.egg
You’ll learn about how you can deploy eggs like this one in production environments in Chapter 21, but for now let’s look at how you can publish eggs on the Python Package Index to make it even easier to share them with the wider Python community.
Publishing an Egg on the Python Package Index
Now that you have successfully created eggs for your application, you can register them on the Python Package Index at http://www.python.org/pypi. Do this by running the following command. Please do this only with your own projects, though, because SimpleSite has already been registered!
When you run the command, some processing is done on the project, and then you are given some choices of how to proceed. Here I’m using my existing login details, but you can choose option 2. to register a new account with the system:
$ python setup.py register
running register
... some lines omitted ...
We need to know who you are, so please choose either:
 1. use your existing login,
 2. register as a new user,
 3. have the server generate a new password for you (and email it to you), or
 4. quit
Your selection [default 1]:  1
Username: thejimmyg
Password:
Server response (200): OK
I can store your PyPI login so future submissions will be faster.
(the login will be stored in /home/james/.pypirc)
Save your login (y/N)?y
The program then asks you whether you want it to save your login details. When I ran the previous example to register SimpleSite, I chose to save them because I knew I’d want to upload the egg files automatically too. This option saved me from having to enter my details again.
Caution!
The Python Package Index authentication is very weak, and passwords are transmitted in plain text. Don’t use any sign-in details that you use for important applications because they could be easily intercepted.
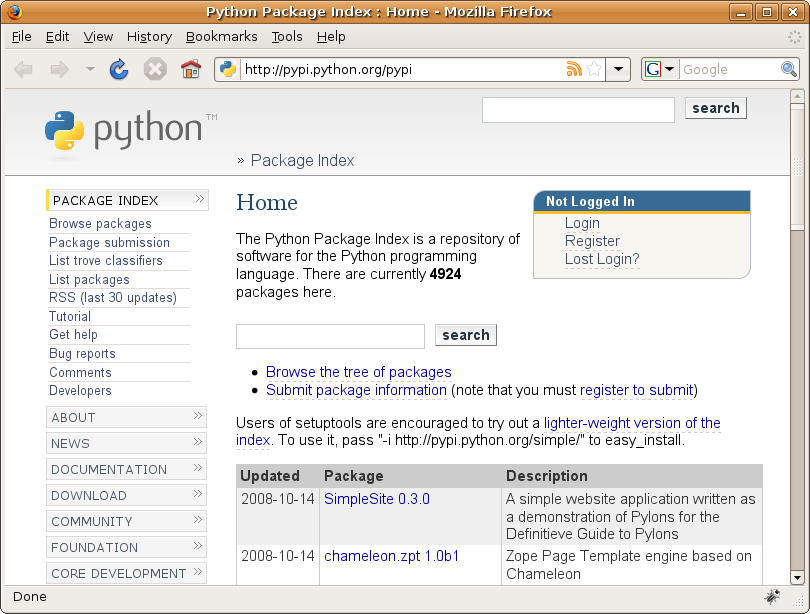
If you visit http://pypi.python.org/pypi/SimpleSite/0.3.0, you’ll see the page that was created by the previous command. It was also shown a few pages ago in Figure 19-7. You’ll also notice that new projects appear at the top of the list of recent projects on the Python Package Index home page, as shown in Figure 19-8.
You can now sign in to the Python Package Index with the account details you used when you registered your application and upload the eggs you’ve created, or if you prefer, you can even have Python do it for you; just enter this command for each version of Python supported to upload the eggs for you:
$ python2.4 setup.py bdist_egg register upload
$ python2.5 setup.py bdist_egg register upload
If you didn’t allow the register command to create a .pypirc file in your home directory for you, you’ll need to create one yourself. It should contain your username and password so that the upload command knows who to sign in as, and it should look similar to this:
[server-login]
username: james
password: password
This works on Windows too, but you will need to set your HOME environment variable first. If your home directory is C:\Documents and Settings\James, you would put your .pypirc file in that directory and set your HOME environment variable with this command:
> SET HOME=C:\Documents and Settings\James
You can now use python setup.py bdist_egg upload as normal.
At this point, your project has been successfully published. Other Python users can now install it just by entering this command:
$ easy_install SimpleSite
With the application successfully published, you might think your work is done, but actually, if you have a project you think would make a good starting point for other people’s projects, you can package it up as a project template. Let’s look at this next.
Making SimpleSite into a Paste Project Template
If you have a Pylons project you think would be useful to other people, it is possible to turn your Pylons project into a Paster project template, which can then be used to automatically generate a skeleton project based on SimpleSite by running this command:
$ paster create --template=SimpleSite MyProject
To set this up for SimpleSite, you’ll need to create a new project called SimpleSiteTemplate, which is just an empty setuptools-enabled package (not a Pylons project this time). Run the following command, and enter the appropriate information when prompted:
$ paster create SimpleSiteTemplate

Selected and implied templates:
  PasteScript#basic_package  A basic setuptools-enabled package

Variables:
  egg:      SimpleSiteTemplate
  package:  simplesitetemplate
  project:  SimpleSiteTemplate
Enter version (Version (like 0.1)) ['']: 0.1
Enter description (One-line description of the package) ['']: A Paste Templatewhich allows you to create a new Pylons project based on the SimpleSite tutorial described in the Pylons Book
Enter long_description (Multi-line description (in reST)) ['']:
Enter keywords (Space-separated keywords/tags) ['']: Pylons Paste Template SimpleSite Simple Site Website
Enter author (Author name) ['']: James Gardner
Enter author_email (Author email) ['']: feedback@pylonsbook.com
Enter url (URL of homepage) ['']: http://pylonsbook.com
Enter license_name (License name) ['']: BSD
Enter zip_safe (True/False: if the package can be distributed as a .zip file) [False]:
Creating template basic_package
Creating directory ./SimpleSiteTemplate
  Recursing into +package+
    Creating ./SimpleSiteTemplate/simplesitetemplate/
    Copying __init__.py to ./SimpleSiteTemplate/simplesitetemplate/__init__.py
  Copying setup.cfg to ./SimpleSiteTemplate/setup.cfg
  Copying setup.py_tmpl to ./SimpleSiteTemplate/setup.py
Running /Users/james/devenv/bin/python setup.py egg_info
This creates a skeleton package with a simple setup.py file built with the settings you entered at the command prompt.
You need a submodule to store the template files that will be used to as a basis for building the Pylons projects. Create a template directory within the SimpleSiteTemplate/simplesitetemplate directory. Next, copy every file and folder underneath the top-level SimpleSite directory into the SimpleSiteTemplate/simplesitetemplate/template directory.
$ cd SimpleSiteProject/simplesiteproject/template
$ cp -pr /path/to/SimpleSite/* ./
You don’t need the data directory, though, because Pylons re-creates this as it is needed based on the settings in the config file of the Pylons package the user eventually creates. You don’t need the dist or build directories either because they will get created automatically too if they are needed, and you don’t need any of the .pyc files or any of the files in SimpleSite.egg-info because they are all re-created by Paste when a user creates a project from the template. You should also remove any development database files you might have used such as the development.db file because users of your template will create their own database and are unlikely to want your existing content.
One command you can use to delete all .pyc files (tested on Mac OS X Leopard) is as follows:
$ find . | grep .pyc | xargs rm
Once you have finished, the SimpleSiteTemplate/simplesitetemplate directory should look like this:
$ ls
MANIFEST.in             docs                    simplesite
README.txt              ez_setup.py             test.ini
SimpleSite.egg-info     setup.cfg
development.ini         setup.py
Next, you’ll need to customize the SimpleSiteProject setup.py file so that Paste is automatically installed if a user tries to use the project template (this is not the setup.py file you copied into the template directory):
install_requires = [
    "Paste>=1.7",
],
At this point, you are ready to start implementing the template part. First, you need to implement the plug-in class, which Paste will use to determine how to create the template. It is very simple. Add this to the SimpleSiteTemplate/simplesitetemplate/__init__.py file:
from paste.script.templates import BasicPackage

class SimpleSitePackage(BasicPackage):
    _template_dir = 'template'
    summary = "A Pylons template to create a simple, user-editable website"
    egg_plugins = ['PasteScript', 'Pylons']
The _template_dir variable specifies the directory that contains the template files, relative to the Python module the BasicPackage class is defined in (in this case the __init__.py file). The summary variable contains the text that is displayed when a user runs the command paster create --list-templates.
Next you need to use egg entry points so that the paster template program can find your new template. Edit the SimpleSiteProject setup.py file again to update the entry_points argument to the setup() function, to look like this:
entry_points="""
    # -*- Entry points: -*-
    [paste.paster_create_template]
    simplesite=simplesitetemplate:SimpleSitePackage
""",
The entry point name will be used as the name of the plug-in, which in this case is simplesite. The second part points to the class that Paste will use to create the file structure for the new project. In this case, it is the SimpleSitePackage class you’ve just created in simplesitetemplate/__init__.py.
At this point, everything is set up and ready to test. Install the package in development mode with the following:
$ python setup.py develop
You can try to create a sample project somewhere, but there will be some problems:
$ cd /path/to/create/new/project
$ paster create --template simplesite MyProject
simplesite MyProject
Selected and implied templates:
  SimpleSiteTemplate#simplesite  A Pylons template to create a simple, user-editable website

Variables:
  egg:      MyProject
  package:  myproject
  project:  MyProject
Enter version (Version (like 0.1)) ['']:
Enter description (One-line description of the package) ['']:
Enter long_description (Multi-line description (in reST)) ['']:
Enter keywords (Space-separated keywords/tags) ['']:
Enter author (Author name) ['']:
Enter author_email (Author email) ['']:
Enter url (URL of homepage) ['']:
Enter license_name (License name) ['']:
Enter zip_safe (True/False: if the package can be distributed as a .zip file) [False]:
Creating template simplesite
Creating directory ./MyProject
  Copying MANIFEST.in to ./MyProject/MANIFEST.in
  Copying README.txt to ./MyProject/README.txt
  Recursing into SimpleSite.egg-info
...
Copying test_models.py to ./MyProject/simplesite/tests/test_models.py
    Copying websetup.py to ./MyProject/simplesite/websetup.py
  Copying test.ini to ./MyProject/test.ini
Running /Users/james/devenv/bin/python setup.py egg_info
Traceback (most recent call last):
...
IOError: No egg-info directory found
...
The command created a SimpleSite.egg-info directory, not a MyProject.egg-info directory, so when the command to set up the egg-info directory was run, it failed. You’ll need to fix that and also change the files and directories in the template directory so that they use variable names that Paste can replace when it creates the template.
It would also be nice if the paster create script prompted you for a SQLAlchemy URL so that no manual editing of the development.ini file was necessary. You’ll learn how do each of these things in the next sections.
Introducing Project Template Variables
Classes derived from BasicPackage like the SimpleSitePackage class you just created can take a vars member variable. This allows you to ask extra questions just before the project is generated. The answers to those questions can then be assigned to variable names you specify, and those variable names can be used in the filenames, directory names, and file content, and they will be substituted for the options chosen on the command line when someone creates a project using the project template.
As you saw in the previous section, the BasicPackage class already asks the person creating a project a number of questions, and it assigns the answers of these questions to the following variables:
version
description
long_description
keywords
author
author_email
url
license_name
zip_safe
If you look at the output when you run the command, you’ll see these variable names in part of the question. For example author_email in the line below:
Enter author_email (Author email) ['']:
Let’s modify SimpleSitePackage to also ask for a value for sqlalchemy_url. Update the simplesitetemplate/__init__.py file to look like this:
from paste.script.templates import BasicPackage, var

class SimpleSitePackage(BasicPackage):
    _template_dir = 'template'
    summary = "A Pylons template to create a simple, user-editable website"
    egg_plugins = ['PasteScript', 'Pylons']
    vars = [
        var('sqlalchemy_url', 'The SQLAlchemy URL to the database to use',
            default='sqlite:///%(here)s/develpment.db'),
    ]
If you run the command again, you’ll now be prompted for a SQLAlchemy URL, and if you don’t provide one, a default of sqlite:///%(here)s/develpment.db will be used.
Enter sqlalchemy_url (The SQLAlchemy URL to the database to use) ['sqlite://%(here)s/develpment.db']:
Tip
There are some other options too, but you won’t use them in this example. If you want to set up a more complex BasicPackage plug-in, you should have a look at the source code at the following location to understand how everything works: http://pythonpaste.org/script/paste/script/templates.py.html.
Using Project Template Variables
Now that the paster create script is correctly prompting the user for all the information you need, it is time to update the files and directories in simplesitetemplate/template to use these variables.
In addition to the variables described so far, Paste sets up three more variables for you. If you look at the output from running the paster create --template=simplesite MyProject command from the previous section, you’ll see them listed near the top:
Variables:
  egg:      MyProject
  package:  myproject
  project:  MyProject
The egg, package, and project variables represent the name used in the egg file, the Python name of the package, and the project name (which is the name that would be used if you published the package on the Python Package Index), respectively. Now that the variables have values assigned to them, you can begin using them in the files and directories in the template directory. Variables can be used in filenames, in directory names, and in the source code itself, but there are a few rules to follow:
When a variable is used in a directory name or filename, it must have + characters on either side. For example:
+egg+.egg_info

+project+.py
Variables within files should be wrapped in {{ and }} characters. For example:
import {{package}}.lib.baseAny file that contains variables should be renamed so that its file extension ends in _tmpl. So, foo.ini would become foo.ini_tmpl, and foo would become foo_tmpl.
In fact, you can perform more complex operations too. The paster create template script understands a very simple template language called Tempita documented at http://pythonpaste.org/tempita/, so you can use any constructs supported by Tempita. Now that you know the rules, let’s go through and update the files, directories, and code in simplesitetemplate/template to use the variables you now have access too, starting by renaming the SimpleSite.egg-info and simplesite directories:
$ cd SimpleSiteTemplate/simplesitetemplate/template
$ rm -r SimpleSite.egg-info
$ mkdir +egg+.egginfo
$ mv simplesite +package+
You can delete the +package+/controllers/template.py.txt file you used as a template for other controllers in Chapter 14.
Now let’s get a list of all the files that contain the word SimpleSite or simplesite, because you’ll need to update them:
$ egrep -rl '(simplesite|SimpleSite)' . | grep -v ".pyc"
./+package+/config/deployment.ini_tmpl
./+package+/config/environment.py
./+package+/config/middleware.py
./+package+/config/routing.py
./+package+/controllers/account.py
./+package+/controllers/comment.py
./+package+/controllers/error.py
./+package+/controllers/nav.py
./+package+/controllers/page.py
./+package+/controllers/section.py
./+package+/controllers/tag.py
./+package+/lib/base.py
./+package+/lib/helpers.py
./+package+/model/__init__.py
./+package+/public/yui/2.6.0/LICENSE.txt
./+package+/templates/base/index.html
./+package+/templates/component/navigation.html
./+package+/tests/functional/test_account.py
./+package+/tests/functional/test_nav.py
./+package+/tests/functional/test_page.py
./+package+/websetup.py
./MANIFEST.in
./README.txt
./development.ini
./docs/index.txt
./setup.cfg
./setup.py
./test.ini
Rename each of these files so that they all have _tmpl added to the end of the filename. The config/deployment.ini_tmpl will need the extension too so will end up as config/deployment.ini_tmpl_tmpl.
If you don’t want to do this manually and are comfortable with a single command that will do this for you in a Bash shell, you could try the following one. The command should be entered on one line, and you are advised to back up your files first in case it behaves slightly differently or your platform:
$ for f in `egrep -rl '(simplesite|SimpleSite)' . | grep -v .pyc `; do mv "$f" "`echo $f`_tmpl"; done
Once the files are renamed, you’ll need to update the contents of the files. The majority of the work is changing the text SimpleSite and simplesite, so let’s do that first:
$ grep -rl simplesite . | xargs perl -pi -w -e 's/simplesite/{{package}}/g;'
$ grep -rl SimpleSite . | xargs perl -pi -w -e 's/SimpleSite/{{project}}/g;'
You also need to use the sqlalchemy_url variable the user has specified to fill in the value of the sqlalchemy.url option in development.ini.
Update development.ini_tmpl so that the sqlalchemy.url option looks like this:
sqlalchemy.url = {{sqlalchemy_url}}
Note
You might be tempted to think that it would be a good idea to use the sqlalchemy_url variable in the config/deployment.ini_tmpl_tmpl file too, but just because users of your application are using a particular SQLAlchemy URL for their development doesn’t mean they will use the same in production.
You should also ensure that none of the files you are about to package contain any usernames, passwords or any other information you don't want distributed. In particular you should check the development.ini and test.ini files.
Now that everything is set up correctly, let’s give the new template a test run. First let’s check that the template has been found:
$ paster create --list-templates
Available templates:
  authenticate_plugin:  An AuthKit authenticate middleware plugin
  basic_package:        A basic setuptools-enabled package
  paste_deploy:         A web application deployed through paste.deploy
  pylons:               Pylons application template
  pylons_minimal:       Pylons minimal application template
  simplesite:           A Pylons template to create a simple, user-editable website
The simplesite project template is correctly listed, so let’s try to create the MyProject application again. Remove the old MyProject directory if you tried to create the project earlier in the chapter, and then run the following command:
$ paster create --template=simplesite MyProject
If everything worked correctly, you can now test the application:
$ cd MyProject
$ python setup.py develop
$ paster setup-app development.ini
$ paster serve --reload development.ini
If you visit http://localhost:5000, you will see the new project correctly serving pages. You’ve successfully created a new project with the same functionality as SimpleSite with just a few commands. At this point, you are ready to start customizing the MyProject application for your own requirements and needs.
Completing the Cycle
If you’ve been following along with the tutorial chapters of the book, you’ll actually have achieved something quite remarkable by this point. You’ll have created a useful product and packaged it up in such a way that other developers can use it as a project template for their own projects without having to re-solve all the problems you’ve already solved.
To complete the cycle, I'd like to show you how I packaged up and released the SimpleSiteTemplate on the Python Package Index so that other developers can use it as a basis for their projects. First I edited setup.cfg to comment out the tag_build and tag_svn_revision options. Then I created a MANIFEST.in file. This tells Python which files need to be included in the package. It looks like this and includes all the files in the template directory:
recursive-include simplesitetemplate/template *
Finally, I ran this command to create and upload the package:
$ python setup.py bdist_egg sdist register upload
Now any user can create a Pylons project based on SimpleSite, just by entering the following commands:
$ easy_install SimpleSiteTemplate
$ paster create --template=simplesite MyProject
I hope you consider packaging any projects you frequently use as a basis for your own projects into Paste Templates in a similar way so that other people can use them as starting points. In this way, members of the Pylons community can quickly and easily build on the success of other Pylons users’ projects.
Summary
You learned a lot in this chapter, from adding authentication and authorization facilities to SimpleSite to customizing Pylons’ error pages. You also saw how to add metadata to projects and how the egg format and Pylons metadata integrate with the Python Package Index so that you can easily publish projects online and automatically create a page containing basic information. You also saw what a project template really is, and you turned the SimpleSite application into a reusable project template so that other people can use it as a basis for their own projects.
That’s the end of the SimpleSite tutorial, but I hope many of the techniques and tools you’ve used to create the SimpleSite application will be useful in your own applications. If you are building a wiki, you might even be able to use the project template as a starting point for your code.
In the next chapter, you’ll look at Pylons’ logging support before moving on to see how to deploy Pylons applications in production environments.